Showing posts with label recipe. Show all posts

Wednesday, March 9, 2016

Easy Spring Orzo Salad

We love orzo here at home. It's a little rice shaped pasta and we use it for this lovely and quick risottata and sometimes just as a side in place of rice or potatoes with some butter and salt and pepper stirred in.


I have never been a big raw spinach person, but lately we have been eating more spinach and we've been enjoying it! I had some spinach, cucumber, cherry tomatoes, and orzo at home last week so I did a little search on google and came across this recipe. I had slightly different ingredients on hand but followed the dressing recipe and it was delicious! (It also made for a great lunch the day after!) If you're looking for an easy and tasty salad, this one may be for you! Also my measurements were all eyeballed so they are not very accurate...that's how everyone cooks right?


Easy Spring Orzo Salad (adapted from The Garden Grazer)
Serves 3 (2 at dinner + lunch for 1)

For the salad:
100g dry orzo
3 handfuls spinach, washed and dried
2 handfuls cherry tomatoes, washed and halved
1/3 of a cucumber, chopped into chunks
1/2 red onion, diced small
feta - as much as you'd like!

For the dressing:
2 tbsp red wine vinegar
1/4 cup olive oil
1/2 clove of garlic, minced
1/2 tsp dried basil
Salt and pepper to taste

To make the dressing, combine vinegar, basil, garlic, and salt and pepper in a bowl. Slowly drizzle in the olive oil whisk to combine.

For the salad, cook the orzo according to the instructions on the package. While the orzo is cooking, prepare all the veg and place them in a medium sized bowl. When the pasta is cooked, drain and add it to the salad immediately. Toss everything. The heat from the orzo will slightly wilt the spinach.

Pour the dressing on the salad and toss to combine. Add the feta and give it a little stir again. Serve immediately or refrigerate it and serve it cold.

Friday, February 5, 2016

Overnight Cardamom Buns


At the bakeries here, you can find these little soft buns called "teboller". They usually come plain, with raisins or chocolate chips. Obviously I love the raisin and chocolate chip ones! When I do make raisin teboller, I usually use Claus Meyer's recipe from his giant baking recipe book, but my one complaint is that they take forever to make. You literally need to set aside half a day to make them. We had a friend over for breakfast last Sunday and I wanted to make some soft buns, but buns that would not be as time consuming. So! I found another Meyer recipe! This one comes from his magazine and is actually for a "fødselsdagsboller" but it's pretty much identical to the teboller in look and taste. I stuck to his recipe and only spiced it with cardamom, but I am sure you could throw raisins or chocolate chips in there too (and omit the cardamom if that's not your thing). The beauty of this recipe is that you can do the first rise in the fridge over night. Major time saver! So just in time for the weekend, here is the recipe for Claus Meyer's Fødselsdagsboller or what I now call Overnight Cardamom Buns. 


Overnight Cardamom Buns / Fødselsdagsboller (recipe from Meyer's Magazine)
Makes 18 - 20 small to medium sized buns

4 dl / 400 ml lukewarm milk
15 g fresh yeast
1 tsp salt
2 tbsp sugar
100 g unsalted butter, softened
2 egg yolks
1 egg
1 tsp ground cardamom (I ground my own - fresh cardamom is always better!)
650 - 700 g all-purpose flour
1 egg for the egg wash

In the bowl of your stand mixer, crumble the fresh yeast and mix it with the lukewarm milk, salt, sugar, cardamom, egg yolks, and egg. Stir until everything is combined and the yeast has dissolved.

Add the flour to the wet mixture a third at a time (starting with 650 g of flour). Using the dough hook and your mixer on the lowest setting, mix in the flour gradually. Depending on how wet the dough looks, you may need to add more flour.

Add the softened butter and mix until combined. This took about 8 minutes on my stand mixer on the lowest setting. The dough should be very smooth and glossy looking. 

Place a piece of cling film over your bowl and place the dough in the fridge to rise overnight (8 hours or so). 

In the morning, take your dough out and divide it into 18 - 20 pieces. My dough was a bit sticky so I floured my work surface and hands to form the 20 pieces into round balls of dough. Place the dough on baking sheets covered with parchment paper and let it rise at room temperature for another 1 to 2 hours.

Preheat the oven to 220 C. Whip the last egg for the egg wash and add a splash of water. Using a brush, brush the egg wash over each bun and sprinkle with oatmeal or chia seeds on top if you'd like. Bake the buns for 10 minutes. When they're ready, let them cool off a bit and then enjoy! If you don't finish all of the buns the same day, make sure to freeze them. They defrost and reheat well.

Wednesday, February 4, 2015

Red Wine Chocolate Cake


I think a lot of people are going to like this recipe! Red wine and chocolate...in cake form. It's like three awesome things in one! Says the person who isn't a huge fan of red wine. But in this cake, I love it! The wine does not fully cook out, but the flavor and depth that the wine brings combined with the dark cocoa powder is amazing and so delicious. And topping the cake with some mascarpone whipped cream or a scoop of vanilla ice cream (like I've shown here) just takes everything to an even more amazing level! Seriously, you need to try this. Maybe something to bake for the weekend?


Red Wine Chocolate Cake (barely from Smitten Kitchen)
Makes 1 (thin) 8 or 9-inch cake

6 tbsp or 85g unsalted butter, at room temperature
3/4 cup firmly packed dark brown sugar
1/4 cup white sugar
1 large egg + 1 large egg yolk, at room temperature
3/4 cup red wine, use something you enjoy drinking
1 tsp vanilla extract
1 cup + 1 tbsp all purpose flour
1/2 cup Dutch processed cocoa powder
1/8 tsp baking soda
1/2 tsp baking powder
1/4 tsp salt
1/4 tsp ground cinnamon

For the mascarpone cream
1/2 cup mascarpone cheese
1/2 cup heavy cream
2 tbsp white sugar
1/4 tsp vanilla extract

Preheat your oven to 325F or 160C. Line the bottom of your round cake pan with parchment paper and lightly grease the sides of the pan with some butter or neutral tasting oil.

In a large bowl and on the medium speed of your mixer, cream the butter until smooth. Add the brown and white sugar and beat until fluffy, about 3 minutes. Add the egg and the yolk and beat well before adding the wine and the vanilla. The batter will look curdled and uneven so don't worry!

Sift the flour, cocoa powder, baking soda, baking powder, cinnamon and salt together in another bowl. Pour 3/4 of the dry mixture into the wet ingredients and mix on low until just combined. Add the rest of the flour mixture and fold it into the batter with a spatula.

Spread the batter in your prepared pan and bake for 25-35 minutes, depending on the size of your pan. When the cake is ready, a toothpick inserted into the center of the cake should come out clean. Cool the cake in the pan for awhile before flipping it out and letting it finish cooling on a rack. Store the cake in an airtight container at room temperature or in the fridge.

If serving with the mascarpone cream, simply whip the cheese, cream, sugar and vanilla together until soft peaks form. Dollop generously on each slice of cake. (The cream should only be made right before serving the cake!)


Writing about this cake makes me wish it was the weekend already! Hope you've been having a great week so far!

Sunday, January 11, 2015

My Favorite Hot Chocolate Recipe


I love a good cup of hot chocolate. Sometimes for a special treat I will order a hot chocolate while I am out in the city, or I will buy some dark chocolate stir sticks to make a fancier cup of hot chocolate at home. But for the times when I am at home and am really craving a hot chocolate, this is my go-to recipe. I always have these ingredients on hand and it makes a really rich and delicious cup of hot chocolate that is actually not too sweet! (That is adjustable of course!) 


Hot Chocolate (barely adapted from Joy of Baking)
Makes 1 cup

3/4 to 1 cup milk
1 tbsp dutch-processed cocoa powder (I use Valrhona)
1 tbsp sugar (or homemade vanilla sugar)
2 tbsp heavy cream

To garnish:
lightly whipped cream
sprinkle of cinnamon

Pour the milk into a small saucepan or pot and heat it over medium heat until it gets hot. I like to whisk the milk while it is heating so it gets a little frothy.

While the milk is heating, mix the cocoa powder, sugar and cream in a mug to form a paste.

Pour the hot milk over the cocoa mixture and stir until combined and the cocoa mixture has completely dissolved. 

And that's it! Top with some lightly whipped cream and a sprinkle of cinnamon for an extra tasty treat!

A bit of an aside, but I have moved from blogspot to my own domain! I want to write more regularly this year and as a little bit of motivation I've moved to www.medkaerlighilsen.com! Thanks for following along and hanging in there with me! 

Saturday, December 6, 2014

26

I celebrated my 26th birthday this past week. My birthday was on the 1st so we invited some of our closest friends here over for some cake and bubbles. I made my favorite devil's food chocolate cake filled with a white chocolate raspberry ganache and topped it with my favorite chocolate cloud frosting. There were macarons and cookies too! (By the way, macaron success! I tried making macarons for the first time following Strangas' recipe and they turned out great!) It was a super low key get together on Sunday afternoon. I just wanted to see everyone and have lots of sweets for everyone to enjoy! The husband and I also had dinner at Kødbyens Fiskebar that night as our own little birthday date. I'll have to post about that separately, but oh my goodness, amazing dishes! Seriously, I love seafood and they take it to a whole other level.


We also celebrated with the in-laws on Monday, the actual day of my birthday. I also got a bouquet of flowers at work which was a nice surprise! For dinner we had some more seafood, surprise surprise! We made this scallop and pea starter and had a more Chinese style baked cod dish for dinner (side note, I follow the recipe for the fish and ingredients but cook the veggies separately and instead of baking it with the fish).


It was a great birthday spent with my closest friends and family here in Copenhagen and I got spoiled by everyone and all their gifts! After a busy week, we've got an even busier weekend! Have a great one everyone!

Saturday, October 18, 2014

Earl Grey Shortbread Cookies


I love earl grey tea. Most days I drink it with a splash of milk but if I'm feeling super fancy, I'll turn my tea into a london fog. Instead of drinking my tea the other day, I felt like putting it in some shortbread. When we were in Leeds this spring, we bought some earl grey shortbread cookies and really enjoyed them. After a quick search, I decided to make these earl grey shortbread cookies. These are literally the easiest cookies to make. Still a few more ingredients than these peanut butter cookies, but seriously, so easy. But more importantly, they taste amazing! They are thin, and crisp, and so buttery with a subtle flavor of earl grey tea. In the recipe comments, some people had increased their amount of earl grey tea but I think the tea flavor would be too strong for me. As always, adjust to your liking friends!


Earl Grey Shortbread Cookies (barely adapted from Claire Robinson)
Makes a ton of cookies, I didn't count. But I probably got like 40+ cookies.

2 cups all purpose flour
2 tablespoons loose Earl Grey tea leaves (approximately 4 tea bags)
1/2 tsp salt
3/4 cup icing/powdered sugar
1 tsp vanilla extract
1 cup or 225g unsalted butter cubed and at room temperature

Claire made her cookie dough in the food processor, but as I don't have one (yet?!), I made mine in my KitchenAid. Just so you know, it is possible either way!

In your mixing bowl, sift together the flour, tea and salt, until there are specks of tea mixed throughout the flour. 

Add the icing sugar, the vanilla extract, and the butter. With your paddle attachment, mix the ingredients together on the lowest speed until a dough forms. 

Place the dough on a long piece of parchment paper and shape into a log. Tightly twist each end of the paper and put it in the fridge to chill for at least 30 minutes.

Preheat the oven to 375F or 170C. Line a few baking sheets with parchment paper.

Slice the log into your desired thickness. I realize now that the recipe said 1/3 inch thick and I think I was aiming more for like 1/8 inch thick. Oops! Either way, slice to your desired thickness. Thicker = fewer cookies, thinner = more cookies. Place the sliced dough on the baking sheets, 2 inches apart. Bake until the edges of the cookies are brown. As my cookies were very thing, that took 8 minutes or so. But if you slice them a bit thicker, you may need up to 12 minutes. 

Once the cookies have browned along the edges, remove them from the oven. Let the cookies cool on the sheet for a few minutes before transferring them to a cooling rack. 

Store the cookies in an airtight container and they should last up to a week. 


I think these earl grey shortbread cookies are perfect for this rainy fall weather here in Copenhagen. Enjoy and share some with your friends and loved ones! 

Monday, October 13, 2014

Happy Thanksgiving!


We celebrated Thanksgiving last night with the husband's family. I thought it would be fun to invite them over for a Thanksgiving dinner as this holiday isn't celebrated in Denmark. As we were only 5 people and I really did not feel like hunting down and cooking a turkey, we had a chicken Thanksgiving dinner!


It was so nice getting to share this Canadian tradition with them. And cooking all of our own food was fun as well! Especially since everyone enjoyed everything! For dinner we roasted two chickens from this recipe, I made this apple and herb stuffing, we had a side of green beans as well as one of our favorite cauliflower recipes (browned butter and panko bread crumbs!!!). And to finish it all off, I made this lovely sweet potato buttermilk pie. Three Smitten Kitchen recipes in one day, I clearly love Deb and her food!


Now it is Monday and I am off to work but Happy Thanksgiving to all of you who are celebrating today! I hope you're enjoying this long weekend with family and friends!

Saturday, October 4, 2014

A Lovely Braided Loaf of Challah Bread


I am slowly making my way into the world of bread baking and having seen a few different challah recipes on Smitten Kitchen's blog, I knew that this beautiful braided bread was something I needed to try. I was particularly interested in making this Jewish bread, which is mostly eaten on Sabbath and holidays, because Deb from Smitten Kitchen compares it to brioche in that "it is a slightly sweet bread enriched with both eggs and fat". I was pretty much sold after that.


Braiding the challah dough was super fun and not as difficult as I thought it would be. I looked at different ways to braid the bread online but the easiest way to do it was just to watch this video while I was in the process of braiding. The gorgeous shine from the bread also comes from Deb's suggestion of doing a double egg wash, once after you have braided it, and again right before putting it in the oven. Seriously, this bread is almost too pretty to eat!


I really enjoyed this bread and I loved the slight sweetness to it. We brought some to a light lunch with our friend B and it paired really nicely with the serrano ham she served that day. We also had it with a butternut squash soup. And lastly, I was waiting for the bread to go slightly stale after a few days to make challah french toast. Delicious! Seriously, I love a good breakfast dinner and challah french toast was perfect.


Best Challah (Egg Bread) (slightly adapted from Smitten Kitchen)
Makes 2 loaves

22 g fresh yeast (or 3 3/4 tsp active dry yeast) / fresh yeast is what is most common here
1 tbsp sugar
1 3/4 cups lukewarm water
1/2 cup olive or vegetable oil
5 large eggs
1/2 cup granulated sugar
1 tbsp table salt
8 cups flour (might be a little less or a little more)
Poppy or sesame seeds to sprinkle on top

In a large bowl, or in the bowl of your stand mixer, whisk together the fresh yeast, 1 tbsp sugar, and lukewarm water. Whisk oil into the yeast and then beat in the 4 eggs, one egg at a time. Add the rest of the sugar and the table salt and beat again. Gradually add the flour to the wet mixture. When the dough holds together, it is ready for kneading.

In your stand mixer with the dough hook attachment, knead the dough until smooth, about 8 minutes. You can also knead the dough by hand on a floured surface. When smooth, form the dough into a round ball and return to the bowl. Cover with plastic wrap and let the dough rise in a warm place for 1 hour, or until almost doubled in size. Once it has completed its first rise, punch down the dough and let it rise for another half hour.

Take the dough out of the bowl and divide it into 2. Divide each half into another 6 strands. Watch this video and braid away! Place the braided loaves on a baking sheet lined with parchment paper with a few inches in between them. Beat the remaining egg and brush it on the loaves. Let the loaves rise for another hour.

When ready to bake, preheat the oven to 375F or 190C and brush the loaves with another coat of egg wash. Sprinkle the bread with sesame or poppy seeds, if using them. Bake in the middle of the oven for 30 to 40 minutes, or until golden. The loaves should also sound hollow when you tap it on the bottom if they are ready. Cool the loaves on a rack. Store the bread in an airtight bag or wrapped up really well to keep it from drying out and going stale too fast.

What's your favorite bread recipe? What do I need to try baking? I would love suggestions!

Monday, September 29, 2014

Flødeboller!


On Saturday, the husband and I and our friend E made flødeboller. But not in it's "normal" shape. We have made flødeboller several times before but this time we made them in molds. We borrowed some molds from another friend of ours and made some round and jewel shaped flødeboller. I think they're so fun and the perfect size treat. Sometimes a whole flødeboller can be a lot so these little truffle size treats were enough to satisfy a little sweet craving.


Flødeboller (slightly adapted from Summerbird)
Makes about 30 bite sized flødeboller in molds

60g water
150g sugar
80g glucose
1 vanilla bean, split and beans scraped out
100g pasteurized egg whites
2 tbsp sugar
200-300g marzipan 
400g quality dark chocolate (between 50 and 70% cacao)

To start, temper 250g chocolate (either melt it over a double boiler, pop it in the microwave for a few seconds or just melt it over low heat in a pot). Pour enough chocolate into the molds so that you can spread it over the entire surface. Add more chocolate when necessary and try to remove any excess. Let the chocolate cool and harden at room temperature or in the fridge.

To make the flødeboller cream, boil the water, 150g of sugar, glucose and vanilla in a saucepan. Use a cooking or candy thermometer and watch the temperature rise, you want the mixture to come to a boil and reach 117 degrees celsius. While the sugar mixture is boiling, whip the pasteurized egg whites with the 2 tablespoons of sugar until you almost get firm peaks forming in your meringue mixture. When the sugar has reached 117 degrees, turn your mixer back on to high and slowly pour the liquid into the meringue mixture. Keep your hand mixer or mixer on its highest speed and continue to whip for another 8 minutes. If you would like to add flavoring to your flødeboller you can do that now. I usually fold in dehydrated fruit that I've crushed into a powder when the cream is ready.  (We did blueberry this time around!) You can choose how intense the flavor will be by adding more or less of the dehydrated fruit powder. When the cream is ready, prepare a piping bag with a round tip and fill it half way. Pipe the cream directly into the molds. Leave some room in the mold so that you can seal the bottom of the flødeboller with marzipan and chocolate next.

Once you have piped all of the cream into the molds, let the flødeboller stand at room temperature for about two hours. This helps the cream set and dry out a bit.

Finally, roll out your marzipan to your desired thickness. Cut out the marcipan rounds with a glass or a shot glass for example, depending on the size of your flødeboller, and place it over the cream. (We used a shot glass and the round end of a piping tip.) Melt your remaining 150g of chocolate and spread it over the marzipan and down the edges of each mold to seal it. Place the flødeboller in the fridge to set and then just gently pop them out of the molds. Gently clean off any excess chocolate you may have on each flødeboller with a small knife.

And then enjoy! If you aren't eating all of your flødeboller at once, do keep them stored in an airtight container in the fridge.


Hope your week is off to a great start friends!

Friday, August 15, 2014

Light Brioche Burger Buns


Although I've started working full time this week, this first week I've only been scheduled to work 9 to 3. Next week is when the real full time hours start! We were thinking about having burgers for dinner on Wednesday evening and since I got off at 3, I decided to make our own burger buns!


And I must say, I am really proud of my little burger buns. They looked and tasted amazing, more like something you would get at a gourmet burger place and not like what you would buy in the grocery store. Our burgers were a mix of a BLT and a caprese salad. We made a basil mayo (by combining bashed basil with some store bought mayo), and packed the burgers with sliced tomatoes, avocados, bacon, lettuce and fresh mozzarella. Amazing! What's your favorite burger combo? What about making your own buns? It is so totally worth it. I used my Kitchenaid for this recipe, but you can also do it by hand. I have only written the instructions for how to make these buns with a stand mixer but do check out Smitten Kitchen's post!


Light Brioche Burger Buns (barely adapted from Smitten Kitchen)
Makes 6 to 8 burger buns, depending on how large you shape them. I got 6.

1 cup lukewarm water
3 tbsp slightly warmed milk
2 tsp active dry yeast or 17 g fresh yeast (I used fresh)
2 1/2 tbsp sugar
2 large eggs
3 cups bread flour (or one with a higher protein content)
1/3 cup all purpose flour
1 1/2 tsp salt
2 1/2 tbsp or 35 g butter, softened
sesame seeds (optional)

In a bowl, stir together the water, milk, fresh yeast and sugar until everything is combined. If using dry yeast, simply let the mixture stand for 5 minutes until foamy. Meanwhile, beat one egg.

In the bowl for your stand mixer, stir together the flours and the salt. Add butter and rub into flour with your fingers, making crumbs. Place bowl in the stand mixer and pour in the yeast mixture and the beaten egg. Turn the mixer on to low and mix until a dough forms. With the stand mixer, continue to knead the dough for 8 to 10 minutes. The dough will be quite sticky but don't be tempted to add anymore flour.

After 8 to 10 minutes of kneading, shape the dough in a round ball, and return the dough to the mixing bowl. Cover bowl with a towel and let it rise in a warm place for 1 to 2 hours. My dough needed an hour and a half.

Line a baking sheet with parchment paper. Take the dough out of the bowl and divide it into 6 to 8 equal portions. Feel free to weigh each portion if you want equal sized buns. Gently roll the dough into round balls and place on the parchment sheet, leaving a few inches between each ball. Cover loosely with a towel or plastic wrap again and let it rise for another 1 to 2 hours.

Set a shallow pan of water at the bottom of your oven. Preheat oven to 400F or 200C. Beat remaining egg and brush on top of each bun. Sprinkle the tops of the buns with sesame seeds, if using. Bake, turning the baking sheet halfway through baking, until the tops are golden brown, about 15 minutes. Transfer to a rack to cool completely.


Enjoy your homemade burger buns!

Thursday, August 7, 2014

My New Kitchenaid + Red Wine Chocolate Cake


As you may have seen from my Instagram, the husband and I went to pick up my new baby on Sunday! I mean Kitchenaid mixer. After returning some duplicate wedding gifts and using some gift cards, we were able to buy our first Kitchenaid. We picked a matte black beauty and I've been admiring ever since. And using it of course! I whipped up a batch of coconut oatmeal raisin cookies on Sunday afternoon and yesterday while our friend P was over, I made a batch of pizza dough for our dinner and a red wine chocolate cake for dessert. So now I've tried the dough hook, the whisk and the flat beater. I'm in love.


I'm not a big wine drinker and I don't appreciate it as much as many other people do but I wanted to try baking this red wine chocolate cake. As the husband and P said last night, it is a very fine and delicate cake. At first bite you taste the chocolate and then the flavor of the wine follows. Paired with a mascarpone cream, this cake was delicious. And as it is quite rich, we could only take a little slice each. This cake definitely feeds a crowd. I baked it in a 8-inch springform pan and well, we still have 3/4 of the cake left. Any takers?

If you love wine and you love chocolate, then this one's for you!


Red Wine Chocolate Cake with Whipped Mascarpone (recipe from Smitten Kitchen)
Makes one 8 or 9 inch cake

For the Cake:
6 tbsp or 85g unsalted butter, softened
3/4 cup packed brown sugar
1/4 cup white granulated sugar
1 large egg + 1 large egg yolk, at room temperature
3/4 cup red wine, any kind you like (I used a cabernet merlot)
1 tsp vanilla extract
1 cup + 1 tbsp all purpose flour
1/2 cup Dutch processed cocoa powder
1/8 tsp baking soda
1/2 tsp baking powder
1/4 tsp salt
1/4 tsp ground cinnamon

For the Mascarpone Cream:
1/2 cup mascarpone cheese
1/2 cup heavy cream
2 tbsp white granulated sugar
1/4 tsp vanilla extract

To make the cake, start by preheating the oven to 325F or 160C. Line the bottom of a 8 or 9-inch springform cake pan with parchment paper and lightly grease/butter the sides of the cake pan.

In a large bowl, on the medium speed of your mixer, cream the butter until smooth. Add the sugars and beat until fluffy, about 3 minutes. Add the egg and egg yolk and beat well before adding the wine and vanilla extract. The batter will look uneven and a little chunky. Don't worry!

Sift the flour, cocoa powder, baking soda, baking powder, salt and cinnamon right over your wet ingredients. Mix until 3/4 combined, then fold the rest together with a spatula.

Spread cake batter into prepared pan and bake for 25 to 30 minutes, and maybe a few extra minutes if you are baking in an 8-inch form. The cake is ready when a tester inserted into the center of the cake comes out clean. The top of the cake should be shiny and smooth. Cool the cake on a rack for 10 minutes before turning it out and leaving it to cool completely on the rack. The cake stores well at room temperature or in the fridge.

When serving, whip up the mascarpone cream. Whip the cream, mascarpone cheese, sugar and vanilla extract together until soft peaks form. Dollop generously on each slice of cake.


Oh and a little FYI, the wine doesn't fully bake out of the cake :)

Wednesday, July 9, 2014

A Naked Chocolate Cake with Summer Berries


It had been awhile since I've baked a cake with buttercream frosting. Sometimes you just want a really good piece of chocolate cake (or sometimes your pavlova layers get burnt in the oven and you need a quick go to recipe to whip up a birthday cake for a friend that evening)!


I turned to my trusty chocolate cupcake recipe for this cake. I doubled Sweetapolita's Classic (One Bowl) Chocolate Cupcake recipe to make two 8-inch cake layers. I wanted the naked cake look so I just made one batch of Sweetapolita's Chocolate Cloud Frosting. I frosted the top of the bottom layer with a thick layer of buttercream before scattering some fresh raspberries and little Danish strawberries over the frosting. I then stacked the top layer of the cake on and spread the rest of the frosting and piled on more berries. This cake stayed moist for days. I stored it in the fridge after serving it on Monday night because it has been so hot here and the frosting would not have held up in the heat. The cake was still moist when I enjoyed the last slice today! This recipe is one of my favorites and super easy to whip up. Definitely save this one for that day when your chocolate cake craving strikes!

Tuesday, June 17, 2014

Summer Strawberries, Two Ways


I am loving all the berries that are available this time of the year. We have been gobbling up as many blueberries, raspberries, and strawberries as we can. I have been making strawberry cake's, jordbær grød, and some delicious rice pudding with strawberry jam mixed in.


I wanted to try making jordbærgrød because Danes love making people say the phrase "rødgrød med fløde", because it is so difficult to say. The fiance has never actually had rødgrød before so I thought it would be fun to try it. Jordbærgrød is basically a runny strawberry jam that you eat hot or cold with cream poured on top. It was a nice afternoon snack and a different way to enjoy strawberries. I was a little weirded out by just pouring heavy cream over the grød but apparently that is what you do!

Jordbærgrød med Fløde (barely adapted from Din Baghave)
I halved the recipe to make 4 portions

500g strawberries
150g raw sugar
50ml water
1 tbsp cornstarch, mixed with a little cold water
heavy cream to serve

Pour the strawberries, sugar and water into a saucepan and bring the mixture to a boil over medium heat. (I crushed my berries a little at this point bit but you don't have to.) Let the strawberry mixture simmer for 5 minutes.

Take the saucepan off of the heat and stir in the cornstarch mixture.

Serve the jordbærgrød slightly warm or cold. Pour some heavy cream on top of each portion to serve.


Here is another Jamie Oliver recipe for you! I am really enjoying his "Jamie at Home" cookbook because he divides the book into seasons and shares recipes based on what produce is available or best in those season. So of course, strawberries were in the summer section of his book! I love a good rice pudding and this is a great way to enjoy it in the summer. This recipe takes some time, but really, next to no effort. Just a bit of stirring! It's delicious and I'm trying really hard not to eat it all before the fiance comes home from work today!


Creamy Rice Pudding with Strawberry Jam (from Jamie Oliver)
makes 6 to 8 servings

For the jam:
2lbs strawberries, hulled, washed and drained
1/2 cup raw sugar

For the rice pudding:
5 cups whole milk
200g medium grain rice (I used grød ris, could also work with risotto rice)
2 tbsp vanilla sugar

Start with making the jam. Place the strawberries in a large bowl and sprinkle the sugar overtop. Squeeze the strawberries so that it starts to turn into pulp and starts looking like jam. Pour the crushed strawberries into a pot and bring it to a boil. Simmer for 20 to 30 minutes on a medium heat and skim the foam off of the top of the jam every 5 minutes or so. Don't worry if the jam is still liquidy, it works well with the rice pudding and will thicken as it cools. Remove the pan from the heat and set aside to cool.

While making the jam, you can also get started on the rice pudding. Place the milk, rice and vanilla sugar into a deep pot. Bring the mixture to a medium simmer on put on the lid. Cook the rice for 30 minutes, stirring occasionally, until it is creamy, oozy and moist. If it is too thick, you can thin it out again with a little bit of milk.

To serve, spoon some of the rice pudding into a bowl and then top it off with a dollop of strawberry jam and some fresh strawberries. And then eat!

If you have leftovers, store the jam and rice pudding separately in airtight containers. The rice pudding will keep for 2 or so days in the fridge and the jam a little bit longer.

If you have other strawberry recipes to share, please do! Happy Tuesday!

Monday, June 9, 2014

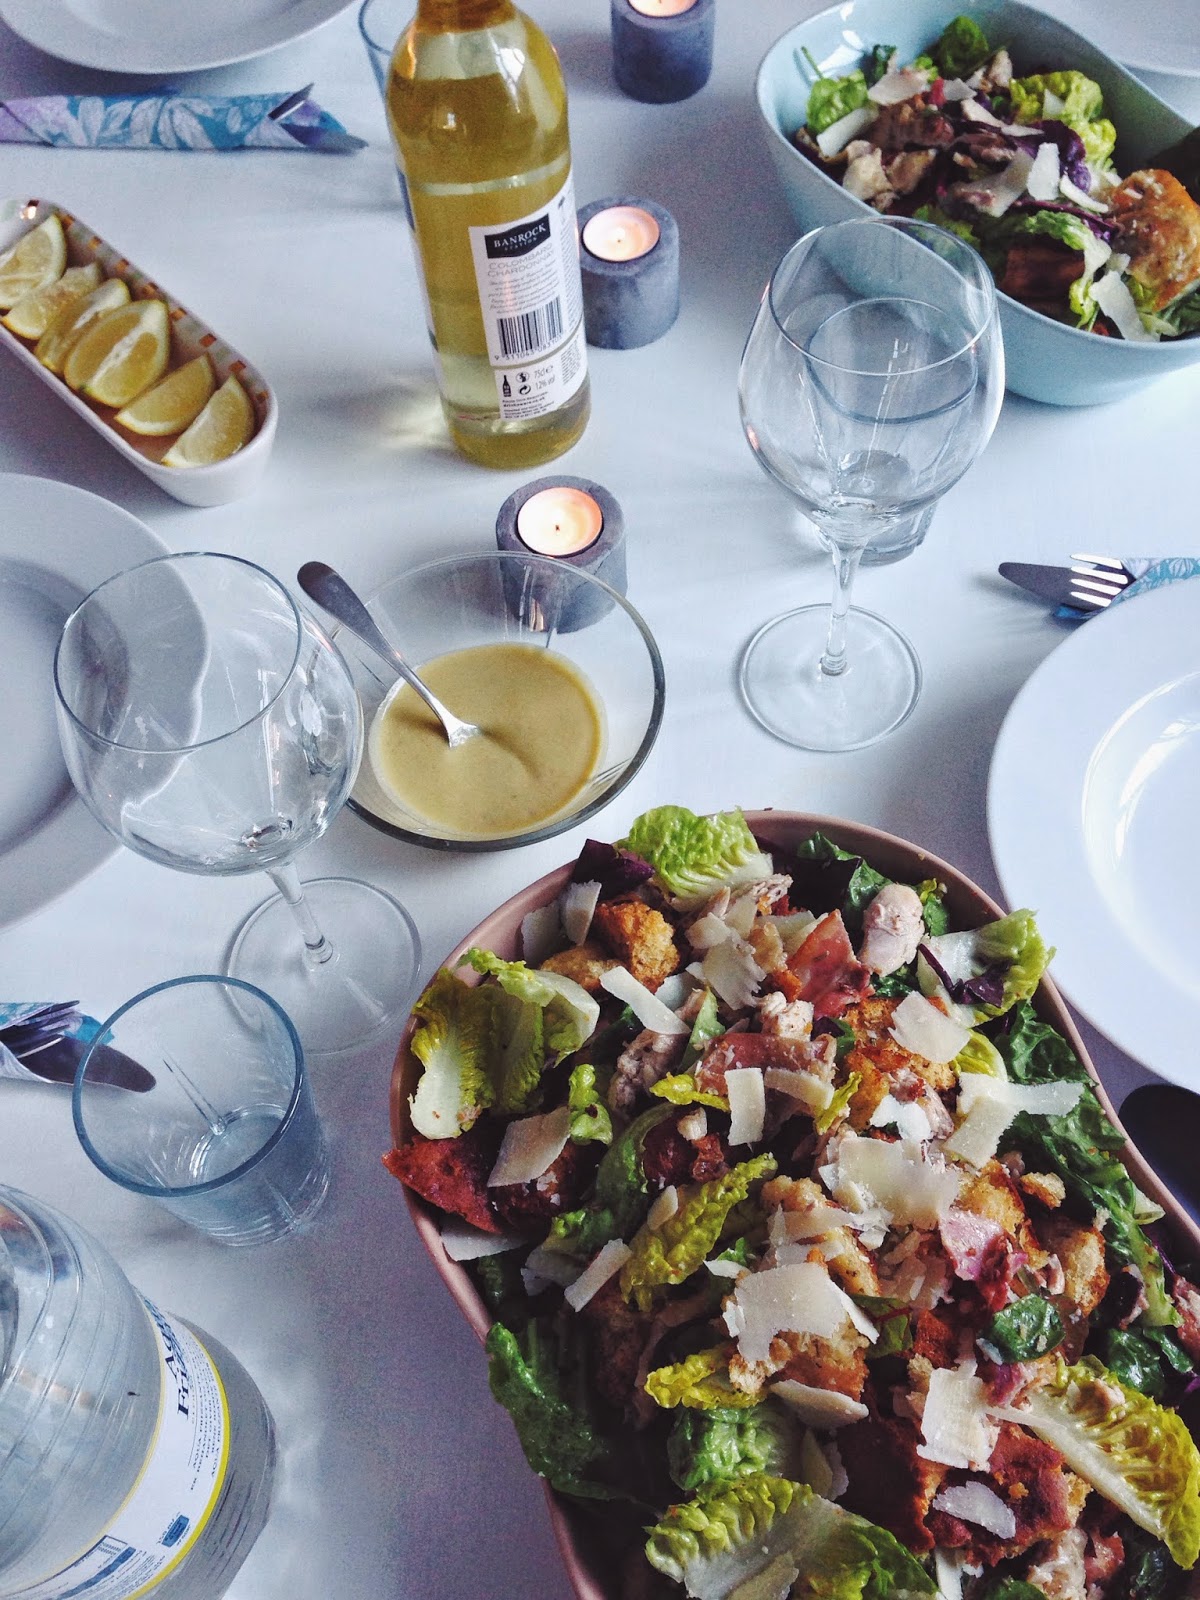
Jamie's Proper Chicken Caesar Salad


One of the things I really miss living here in Copenhagen is caesar salad. I used to work at Milestone's in Vancouver and their roasted garlic caesar salad is my favorite. I like a strong caesar salad dressing and I just haven't been able to find it in the bottled versions here in Copenhagen.

I borrowed Jamie Oliver's book "Jamie at Home: Cook Your Way to the Good Life" at the library recently and I just had to try his caesar salad recipe. And I must say, it is really good! Jamie's caesar dressing is light, but still rich in flavor. Combined with the roasted chicken and croutons, an extra sprinkling of parmesan cheese and a squeeze of lemon juice, it is the perfect summer dinner. I'm thinking next time I'll throw some roasted garlic into the dressing as well!


I would type out the whole recipe for you but Jamie's team already has some great instructions and step-by-step photos on his website. Find the ingredients and the recipe for Jamie's "Proper Chicken Caesar Salad" here!

It has been a really long weekend here in Copenhagen. Our weekend started with going to Distortion in Nørrebro on Wednesday night, running different wedding errands on Thursday and Friday, meeting with different friends for dinner and cocktails in the city over the last few days, and we have been enjoying the last day of the long weekend outside in our backyard. What have you been up to lately?

Friday, June 6, 2014

Chocolate Caramel Shortbread


While the fiance and I were in Leeds visiting my sister the other week, we tried this amazing salted caramel shortbread from Layne's Espresso. A buttery shortbread topped with oozy salted caramel and a thin layer of dark chocolate. It was amazing. Seriously. And of course I had to give it a shot myself!


This is a decadent treat. I mean, one square of this chocolate caramel shortbread is enough to satisfy your sweet tooth for a full day. The caramel in this recipe is soft, but holds it's shape and won't leave you with seriously sticky fingers. I used chocolate with 70% cacao solids and it really balances out the sweetness from the caramel. An extra pinch of salt in the caramel and a light sprinkling of it on top of the chocolate leaves you with a lovely salted caramel cookie.

You might want a glass of water or milk close by when you indulge in this treat!


Chocolate Caramel Shortbread (barely adapted from Once Upon a Chef)
Makes 16 squares, fills 1 8x8 square pan

For the shortbread
1 cup flour
1/4 cup dark brown sugar
2 tsp cornstarch
1/4 tsp salt
1/2 cup or 113 g unsalted butter, cut into 1/2 inch cubes
1 tbsp ice water
1 large egg yolk

For the caramel
1 (14 oz) can sweetened condensed milk
1/2 cup dark brown sugar
6 tbsp or 85 g unsalted butter
2 tbsp golden syrup
1 tsp vanilla extract
generous pinch of salt

For the chocolate layer
6 ounces or 170 g chocolate, use semisweet or dark (I used 100 g 70% cacao chocolate and 70 g semisweet chocolate)
3 tbsp heavy cream

Start with the shortbread layer by preheating the oven to 350F or 175C. Line your square pan with parchment paper or aluminum foil, making sure there is an overhang so that it will be easy to remove the cookies from the tray later.

In a medium bowl, sift together the flour, brown sugar, cornstarch and salt. Sift and break up any clumps of brown sugar. Cut in the butter (with a pastry cutter, food processor or with your fingers) until a coarse meal forms. Add the ice water and egg yolk and gently mix until moist clumps form. Dump the mixture into the pan and press with your fingers to form an even layer. Sprinkle some flour on your fingers if necessary to keep them from sticking to the dough. Pierce the dough all over with a fork and bake in the oven for 20 minutes, or until golden. Set aside to cool.

When your shortbread has finished baking, start making the caramel. Whisk the sweetened condensed milk, brown sugar, butter, syrup, vanilla extract and salt in a medium sized saucepan over medium heat. When the sugar and butter have melted and the mixture starts to boil, place a candy thermometer into the pot, boil gently and whisk until the caramel thickens reaches 225F or 107C. Once the caramel has reached the right temperature, pour it over the layer of shortbread and let it cool until set.

Chop the chocolate and place it into a small saucepan with the heavy cream. Heat on a low heat and stir until the chocolate and cream have combined. Pour and spread the chocolate over the caramel. Sprinkle a bit more salt on top if you'd like. Place the pan in the fridge for at least 1 hour for the chocolate to set. When the chocolate has set, cut the shortbread into squares and store in an airtight box in the fridge until ready to serve.

Friday, May 30, 2014

A Delightful Raspberry Mousse Cake topped with Crunchy Meringues


I invited some of my girl friends over for dinner last night and had prepared a menu of chicken caesar salad (will share that recipe next!) followed by this wonderful raspberry mousse cake. I made this cake with another friend the other week in Helsingør but this time I made the cake a day earlier so it had even longer to set, I topped it off with a drizzle of melted chocolate and a handful of crispy vanilla meringues too!

I have made several of Maja of Chocolat's recipes before and I've always had success with them. She is a lovely Danish dessert blogger and her Gateau Marcel is my favorite! She shares a lot of gluten free recipes as well which I really appreciate and is perfect for when I have gluten free guests over.

Anyways, let's get to the cake shall we?


Raspberry Mousse Cake topped with Crunchy Meringues (slightly adapted from Chocolat)
Fills a 17-19cm spring form pan, enough for 6 to 8 people depending on portion size

For the chocolate cake base:

100 g chopped chocolate, 70% cacao and up
50 g unsalted butter
100 g or 1/2 cup sugar (raw or white sugar works)
2 large eggs

For the raspberry mousse:

300 g raspberries (fresh or frozen)
2 tbsp to just under 1/4 cup sugar (I went towards the higher amount)
1 tbsp vanilla extract, or seeds from 1 vanilla bean
1 to 2 tbsp fresh lemon juice
3 gelatin sheets
120 ml or 1/2 cup heavy cream
120 g or 1/2 cup skyr (can substitute with greek yogurt if skyr isn't available for you)

For the meringues (didn't really follow a recipe, basic meringue making guide):

2 large egg whites, at room temperature
100 g or 1/2 cup of white granulated sugar
1 tbsp of vanilla extract

Preheat the oven to 175C or 350F. Start with making the chocolate cake base by melting the chocolate with the unsalted better. Maja suggests doing it over a double broiler but I just melt it directly on the stove (over low heat) in a small saucepan, or you can melt it in the microwave as well. When the chocolate and butter has melted and combined, pour the mixture into a medium sized mixing bowl and add the sugar and mix. Crack the two eggs directly into the chocolate cake mixture and beat with a whisk until you get a smooth and glossy batter.  Pour the chocolate batter into your springform, line it with a parchment circle if you wish, and bake for 25 minutes. Let the cake cool completely.

To make the raspberry mousse, make a raspberry puree by pouring your berries, sugar, vanilla extract, and lemon juice into a small sauce pan. Cook the mixture on medium low, until it starts to boil gently. Prepare your gelatin sheets as well by placing them in a bowl of cold water for about 5 minutes. When your raspberry mixture starts to boil, take it off the stove and strain it through a sieve to get rid of the seeds. Pour the liquid from the puree back into the saucepan and warm it up again, until it reaches a slight boil. Wring out your gelatin sheets and stir them into the raspberry sauce. Place the mixture in the fridge for a few minutes while you prepare the rest of the mousse. Whip the heavy cream in a large mixing bowl until you get strong peaks or until you can turn the bowl upside down without anything falling out. Fold in the skyr before pouring the raspberry sauce into the cream mixture and folding again, until everything is combined. Pour the raspberry mousse over the chocolate cake layer and place in the fridge for at least 4 hours and overnight if you have the time.

The meringues can be made before or after the cake has been made. You can store them in an airtight container for up to a week. Simply beat the egg whites with a mixer on high until you reach soft peaks before adding the 1/2 cup of sugar and vanilla extract. Beat for a few more minutes until you get a glossy meringue with stiff peaks. Pipe your meringues onto a lined baking sheet. Bake in a preheated oven at about 80C or 175F for 1 hour and 40 minutes, or until the meringues are firm and dry to the touch and can easily come off the baking sheet. Turn off the oven when the meringues are ready, and cool them in there with the oven door cracked open. Store them in an airtight container until ready to be used or eaten.

To serve the cake, feel free to drizzle some chocolate on top (I used about 50 g of melted semisweet chocolate here). Place in the fridge to set. I didn't place my meringues onto the cake until I was ready to serve it as the moisture in the fridge would have ruined them. Before serving, I dipped the bottoms of my meringues in some melted white chocolate (again, about 50 g) and placed them on top of the cake. I finally topped it off with a dusting of dehydrated raspberries which I crushed into a powder in my mortar.


And that is how you make this delightful raspberry mousse cake! A beautiful, light and refreshing dessert that everyone will enjoy. I mean, the four of us girls finished this whole cake last night! Well, we were nice and saved the fiance a slice, but otherwise, we absolutely devoured it!