Showing posts with label dessert. Show all posts

Monday, September 29, 2014

Flødeboller!


On Saturday, the husband and I and our friend E made flødeboller. But not in it's "normal" shape. We have made flødeboller several times before but this time we made them in molds. We borrowed some molds from another friend of ours and made some round and jewel shaped flødeboller. I think they're so fun and the perfect size treat. Sometimes a whole flødeboller can be a lot so these little truffle size treats were enough to satisfy a little sweet craving.


Flødeboller (slightly adapted from Summerbird)
Makes about 30 bite sized flødeboller in molds

60g water
150g sugar
80g glucose
1 vanilla bean, split and beans scraped out
100g pasteurized egg whites
2 tbsp sugar
200-300g marzipan 
400g quality dark chocolate (between 50 and 70% cacao)

To start, temper 250g chocolate (either melt it over a double boiler, pop it in the microwave for a few seconds or just melt it over low heat in a pot). Pour enough chocolate into the molds so that you can spread it over the entire surface. Add more chocolate when necessary and try to remove any excess. Let the chocolate cool and harden at room temperature or in the fridge.

To make the flødeboller cream, boil the water, 150g of sugar, glucose and vanilla in a saucepan. Use a cooking or candy thermometer and watch the temperature rise, you want the mixture to come to a boil and reach 117 degrees celsius. While the sugar mixture is boiling, whip the pasteurized egg whites with the 2 tablespoons of sugar until you almost get firm peaks forming in your meringue mixture. When the sugar has reached 117 degrees, turn your mixer back on to high and slowly pour the liquid into the meringue mixture. Keep your hand mixer or mixer on its highest speed and continue to whip for another 8 minutes. If you would like to add flavoring to your flødeboller you can do that now. I usually fold in dehydrated fruit that I've crushed into a powder when the cream is ready.  (We did blueberry this time around!) You can choose how intense the flavor will be by adding more or less of the dehydrated fruit powder. When the cream is ready, prepare a piping bag with a round tip and fill it half way. Pipe the cream directly into the molds. Leave some room in the mold so that you can seal the bottom of the flødeboller with marzipan and chocolate next.

Once you have piped all of the cream into the molds, let the flødeboller stand at room temperature for about two hours. This helps the cream set and dry out a bit.

Finally, roll out your marzipan to your desired thickness. Cut out the marcipan rounds with a glass or a shot glass for example, depending on the size of your flødeboller, and place it over the cream. (We used a shot glass and the round end of a piping tip.) Melt your remaining 150g of chocolate and spread it over the marzipan and down the edges of each mold to seal it. Place the flødeboller in the fridge to set and then just gently pop them out of the molds. Gently clean off any excess chocolate you may have on each flødeboller with a small knife.

And then enjoy! If you aren't eating all of your flødeboller at once, do keep them stored in an airtight container in the fridge.


Hope your week is off to a great start friends!

Thursday, April 3, 2014

Chocolate Almond Meringues

I mentioned the other day that the fiance and I enjoyed some amazing meringues from Dessertdragen last week. Well, when I'm really into something, I'm really into something. So, I did some reading on meringues, compared a few recipes (most of the recipes out there are very similar), and whipped up a batch.


I make meringues every once in awhile. Sometimes I flavor them with freeze dried raspberry powder, or with lemon zest. And I usually pipe them out so they are just little bite sized meringues. But this time I wanted to do something bigger, a little fluffier, and a little more messy looking like the meringues we got from Dessertdragen. I have used quite a few of Joy the Baker's meringue recipes so I looked to her again and I found another great recipe from Cupcakes and Couscous. I used a bit of both recipes and got these wonderful chocolate and almond meringues! I like meringues that are crisp on the outside, but soft, marshmallowy and chewy on the inside. And these my friends, are exactly that!


Chocolate Almond Meringues (adapted from Joy the Baker and Cupcakes and Couscous)
Makes 12 large meringues

3 egg whites, at room temperature
pinch of salt
1/4 tsp cream of tartar
1/2 tsp vanilla extract
3/4 cup granulated sugar
50g dark chocolate, finely chopped
50g almonds, coarsely chopped
1 tbsp cocoa powder

To start, preheat your oven to 120C or 248F and line a baking sheet with parchment paper and set aside.

In a clean and dry bowl, beat egg whites with a hand or stand mixer on medium speed until it turns foamy. Add a pinch of salt and the cream of tartar. Increase the speed on your mixer to medium high and beat until you get soft peaks.

Gradually add the sugar and increase your mixer speed to high. Add the vanilla extract now as well and beat for about 3 minutes on high speed, or until stiff and glossy peaks form. (The meringue should be spoonable but keep their shape when dolloped onto the baking tray.)

Add the chopped chocolate and almonds to the meringue and gently fold them in with a spatula. Finally, sift the cocoa powder over the meringue mixture and lightly fold it in. If you want some chocolate streaks, don't fold the cocoa powder in completely.

Drop large spoonfuls of the meringue onto your prepared baking sheet. Place in the middle of the oven and bake the meringues for 1 hour, or until firm. Remove from the oven to cool when they are ready and enjoy!


We ate our meringues tonight with some whipped cream and berry sauce just like a pavlova! Delicious!

Monday, March 24, 2014

Making Macarons at Strangas

I've attempted making macarons at home three times and every time the macaron shells have either been hollow, or they haven't developed feet, or they've just plain stuck to my baking paper and crumbled when I tried to take them off. I love eating macarons but they are definitely not easy to make!


My future mother-in-law remembered that I had mentioned that Strangas offers a macaron course, and so for Christmas my future in-laws gifted me with the opportunity to take one of Nikolaos' macaron classes! Yesterday morning I, along with seven other participants, spent four hours in the dessert boutique learning how to make macarons using Strangas' own recipe.


We started the class off with some of his amazing scones and some coffee. (If you haven't tried his banana seabuckthorn jam, you really need to. It's delicious!) Then we paired off and started making two types of macarons. One with a dark chocolate ganache filling, and the other was filled with a raspberry chocolate ganache. We dived in and made the ganache first before starting the macaron shells. All along the way, Strangas guided us and helped us through the different steps.


I really enjoyed the class and how hands on it was. Rather than just watching Nikolaos make the macarons, we did everything on our own with him stepping in from time to time. He also went over the different types of chocolate you can use in a ganache. He gave us three different Valhrona chocolates to sample and talked to us about the differences in flavor and richness with each one. Making perfect macaron shells takes a lot of precision, and we learnt what to be careful of and how different steps in the process can cause mistakes and potentially ruin our macarons. I'm just hoping that I can replicate the macarons we made today at home!


Have you made macarons before? Do you have any tips to making the perfect macaron shells? And what do you like to fill them with? Strangas almost only uses ganaches, but I've also filled mine with lemon curd and vanilla bean buttercream.


If you would like to learn how to make macarons in Copenhagen, I can definitely recommend taking the class at Strangas. But then again, I always recommend everything I have from there! And now I am off to eat another macaron! Have a great Monday!

Thursday, October 31, 2013

Brownies for Everyone!


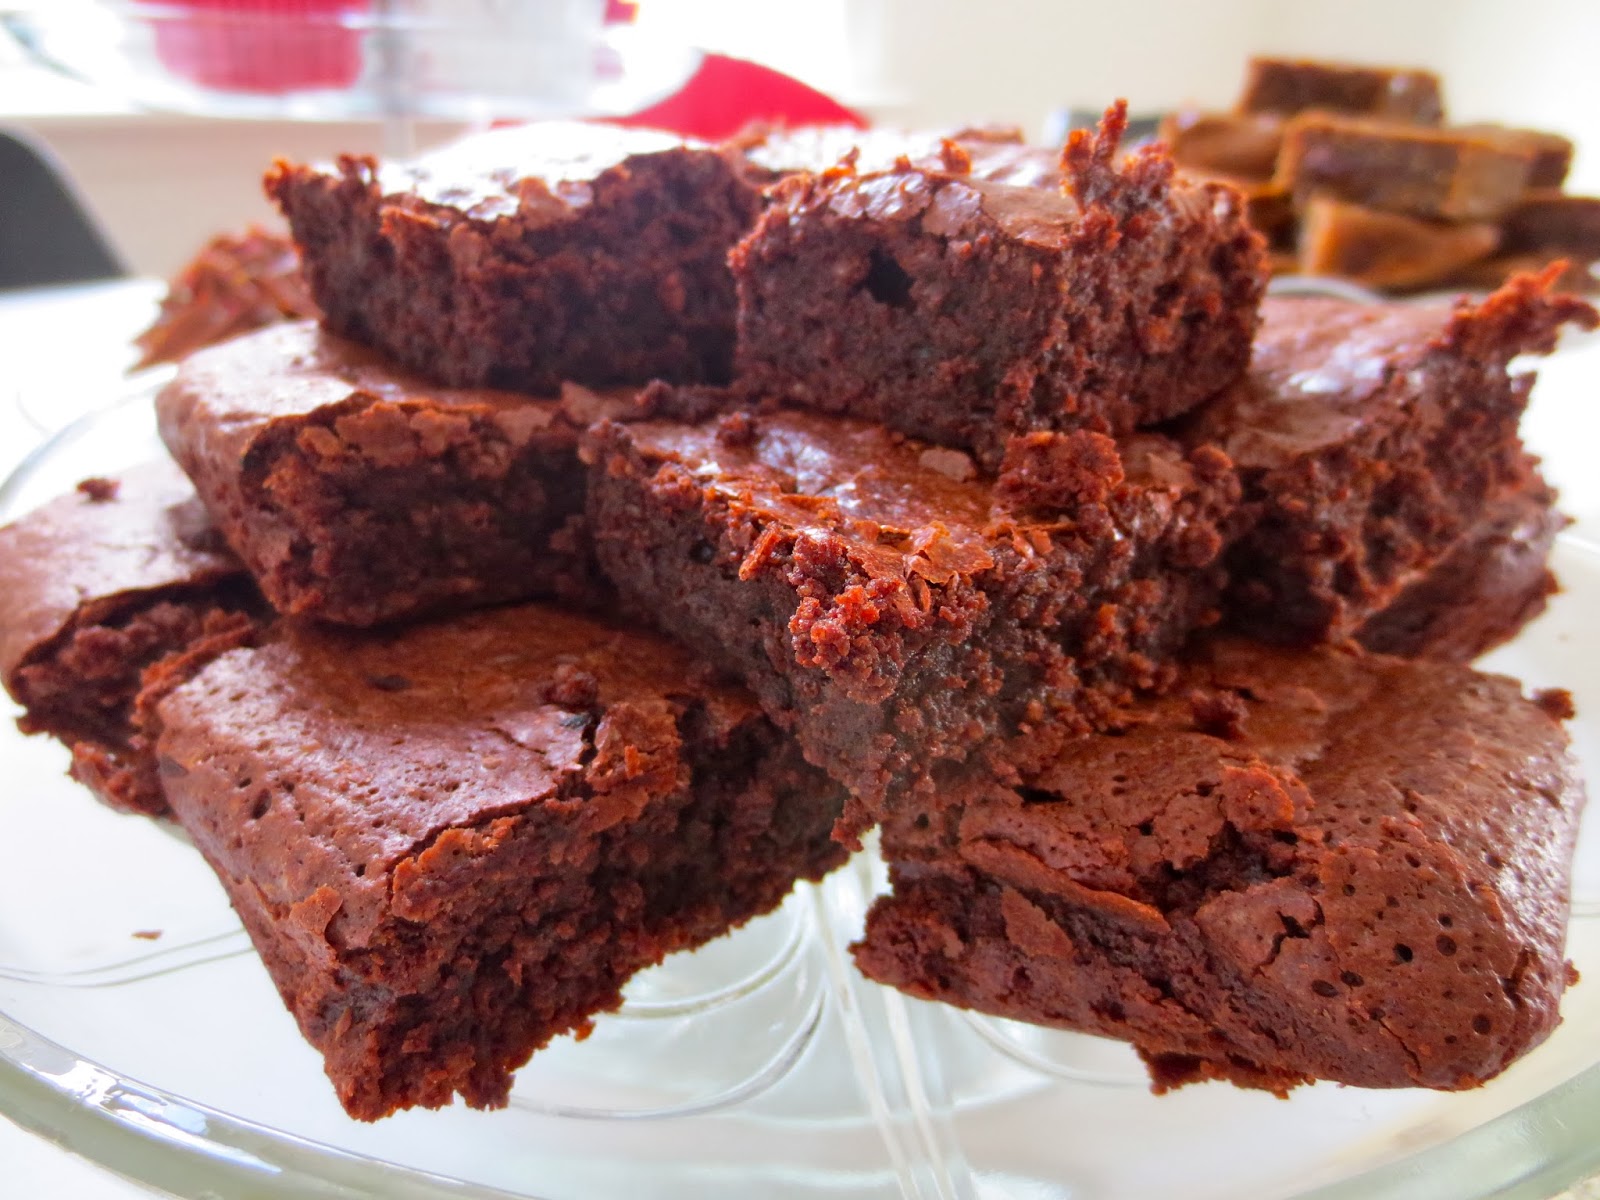
I can't believe I haven't shared a brownie recipe on here yet! Well, you are in for a real treat because this brownie is delicious and it is gluten free! I know the pictures of the brownies don't look amazing, but they are. Trust me on this one! I have made this a handful of times now and it is fudgy, rich, and all of my gluten free friends can enjoy it. The recipe is quite similar to my other favorite brownie recipe except that you use almond flour instead of regular all purpose flour.


I made a batch of these brownies last week for our housewarming and I never took a piece for myself. (I also made these devil's food chocolate cupcakes topped with chocolate cloud frosting and a tray of banana milk chocolate blondies.) Writing this now makes me wish I had! If you're looking for a great brownie recipe or want to try something different than your usual go-to, give this one a try!


Almond Flour Brownies (slightly adapted from Tracey's Culinary Adventures)
Fills 1 8x8 baking pan, 16 pieces when sliced

1/2 cup (113g) unsalted butter
5 oz (140g) bittersweet chocolate, 70% cocoa solids and up
2 tbsp cocoa powder
1 tsp instant coffee
3 large eggs, at room temperature
3/4 cup sugar
1 tsp vanilla extract
1/4 tsp salt
3/4 cup almond flour

Preheat oven to 350F or 170C. Line a 8x8 baking pan with parchment paper or grease it well.

Chop up 5 oz or 140g worth of bittersweet chocolate and place it in a small pot along with the butter. Melt on a low heat and stir to combine the chocolate and butter. When the chocolate and butter has completely melted and the mixture is smooth, take it off the heat and whisk in the cocoa powder and the instant coffee. Set this mixture aside to cool slightly.

In a medium bowl, whisk together the eggs, sugar, vanilla, and salt until combined. Add the slightly cooled chocolate mixture to the whisked eggs and stir until combined. Finally, stir in the almond flour with a rubber spatula until just incorporated.

Pour the brownie batter into the prepared pan and bake for about 25-30 minutes. (I usually take them out at 25.) You can test if the brownies are ready by sticking a toothpick in the center, but unlike baking cakes, you actually want some moist crumbs to stick to the toothpick. Watch the time and don't over bake them! Let the brownies completely cool in the pan before slicing them.

Happy eating!

Tuesday, October 1, 2013

The Last of September

Last week was a lot of fun.


I did an exchange semester in Hong Kong five years ago now and one of the friends I made there was in town for two days. M is a flight attendant and she flew into Copenhagen for the first time ever last week so we spent a day and a half wandering around the city, I took her to my favorite cafes, and we had the most wonderful time catching up on life. You can read more about her time here in Copie on her blog, she wrote the most beautiful post about her two days here.


I also tried dip dying for the first time last week! I would like to have ombre looking pillows for our couch in our living room so I tested it out on some old pillow cases first. I love them. We are currently using the dip dyed pillows in our bedroom even though they don't match our duvet covers. I bought some olive green and amethyst dye so I'll be dipping some more pillow cases soon! First, I have to find some good white cotton pillow cases...


On the weekend, the boyfriend was like "I want some gammeldags æblekage" which translates to old-fashion apple cake. The word kage/cake throws me off though because there is no actual cake in this dessert! It is so simple to make. All you need is some applesauce, whipped cream, and some crumble topping. Layer them in that order and there you go! It is a tasty little treat. I just wish there was some actual cake in there!

What were the highlights of your week?

Saturday, July 13, 2013

Vanilla Skyr Panna Cotta


I had a wisdom tooth pulled out on Monday afternoon and according to my dentist, I was only supposed to eat cold soft foods that day and for a few days after that. I was like "even dinner?!" and he was like "you can have some ice cream, a smoothie, or yogurt" etc. etc. I texted the boyfriend right after I left the dentist's office and I was like "I CAN ONLY EAT ICE CREAM FOR DINNER!". Pretty much my dream come true.

I like yogurt on its own and blended into smoothies, but I also thought it would be fun to find other ways to eat it since I was going to be having it for a few days. I love panna cotta and I'd seen some recipes for yogurt panna cotta's floating around so I made some with skyr. It had the same soft texture as panna cotta with cream, but it didn't feel as heavy or rich. I do like the creamier version of panna cotta made with whipping cream but this yogurt one is also nice in its own lighter way.

***I've been making this panna cotta with 1/2 to 3/4 cup heavy cream and it makes the panna cotta so much creamier and richer. Love this combination! - January 31, 2014


Vanilla Skyr (or Yogurt) Panna Cotta (adapted from Smitten Kitchen)
Makes 4 servings.

2 tbsp water
11/4 tsp unflavored and powdered gelatin
1 cup skyr or yogurt of your choice
1 cup milk, heavy cream, or a combination of the two (I just used milk)
2 tbsp vanilla sugar or white sugar
1/2 tsp vanilla extract

Place water in a small bowl. Stir in gelatin and set aside until the gelatin softens, about 15 minutes.

In a large bowl, whisk the skyr with 1/2 cup milk until combined. In a small saucepan, bring the other 1/2 cup of milk and the sugar to a simmer. Stir in the water and gelatin mixture (it will dissolve immediately) and remove from the heat. Whisk this hot mixture into the skyr, then stir in the vanilla extract.

Pour mixture into glasses or cups (if you would like to unmold them, oil the glasses first with a neutral tasting oil) and place in the fridge to set for at least 2 hours. Panna cotta can stay in the fridge for two or three days. Serve with fresh fruit and enjoy!

I totally ate this for breakfast!

Sunday, June 30, 2013

So Many Flødeboller


It has been a fun week full of spending time with friends, celebrating birthdays, baking fancy cakes, and making lots of flødeboller! They are pretty much chocolate covered marshmallow fluff piped over a thin piece of marzipan. I love them and they are one of my favorite Danish treats. One of my friends was on holidays this week and we thought it'd be nice to make some flødeboller since it has been awhile since our last attempt. And we went big. We made a double batch and filled them with different flavors.

In a few of the flødeboller we placed a whole strawberry on top of the marzipan and then piped the marshmallow fluff around it. For the other ones we left some of them plain with the original marshmallow recipe and topped them with crushed pistachios. We also added some freeze dried raspberry powder to part of the marshmallow mixture and some freeze dried seabuckthorn powder to the rest. These fruity flavors were subtle but rounded out the sweetness of the flødeboller really well.

These flødeboller weren't perfect though, the marshmallow center was not as fluffy and stiff as I would like. We followed the recipe and whipped it for 8 minutes and when we piped it they were the right consistency. But when we ate them the next evening, they were more like melty marshmallow and not a nice firm foam, the way they are when you buy them. So we still have some work to do but they still taste phenomenal!


Flødeboller (recipe adapted from Summerbird)
makes about 15 small flødeboller, depending on what size you choose to make them

60g water
150g sugar
80g glucose
1 vanilla bean, split and scraped
100g pasteurized egg whites
2 tbsp sugar
200g marzipan
250g dark chocolate, 70% cocoa solids and up
1 tbsp butter

Sprinkle some powdered sugar on your countertop or board and roll out the marzipan to your desired thickness. Cut out rounds for the bottoms of your flødeboller with a round cookie cutter or use a shot glass or a water glass like we did. Place the marzipan rounds on a tray lined with parchment paper and set aside.

Boil water, sugar, glucose, and the seeds from the vanilla bean in a small saucepan until the mixture reaches 117 degrees celsius. Use a candy thermometer if you have one, otherwise other cooking thermometers would also work. Whip the pasteurized egg whites with the 2 tablespoons of sugar until it is almost stiff while also slowly and steadily pouring the hot sugar mixture into it. Whip this mixture for another 8 minutes to create the marshmallow fluff. To add flavors to your flødeboller, simply fold a tablespoon or two of freeze dried fruit powder to your  marshmallow cream after it has been whipped for the full 8 minutes.

Fill a piping bag, with a round tip or simply use a piping bag with the end cut off, with the marshmallow mixture. Pipe some marshmallow fluff over each marzipan round and then set aside to rest for a few hours. We set ours to chill in the fridge for an hour.

Melt the chocolate over a water bath. To thin out the chocolate a little bit, I added a tablespoon of butter to the chocolate while it was melting. Place the flødeboller on a cooling rack and drizzle the melted chocolate over them until the marshmallow and marzipan are completely covered. We placed our flødeboller back in the fridge once they were covered with chocolate and kept them there until we were ready to eat them. Otherwise, leave the chocolate covered flødeboller out in a cool dry place so that the chocolate can completely harden.


As delicious as these are, I could only eat one of them at a time. These are indulgent treats so just having one was enough for me!

Sunday, June 23, 2013

Everything Under the Sun


It was the boyfriend's birthday on Friday! We made two gateau marcel's for him to take to work and share with his colleagues. When he came home in the afternoon we went for coffee on Gammel Kongevej. After coffee we had dinner with his family at Sticks'n'Sushi and they came over afterwards for some coffee and profiteroles and the boyfriend opened his presents. It was a really relaxing and cozy evening. 


Yesterday afternoon we biked to the opera house to watch the Red Bull Cliff Diving World Series here in the harbor with some friends. It was amazing to watch all of the divers free fall, do twists and flips from the roof of the opera house and dive into the water. 


Earlier this week my classmate posted a link to a new dessert and cocktail bar that just opened in the city. The bar is called Candeur and it is located at Ny Adelgade 4. The boyfriend and I went there with three of his friends and I had a great banana cake topped with banana chips and served with chocolate ice cream as well as a refreshing lemonade. The boys had some cocktails and everyone really liked the idea of going out after having dinner at home or a restaurant, and having desserts and cocktails later in the evening at a different place. Plus they had really awesome service. We will definitely be going there again.


I wanted to bake something this morning and I asked the boyfriend what he felt like and he said scones. Luckily, we had everything we needed in the fridge already so scones were made! I have a go-to recipe for lemon blueberry scones but I thought I would try a new one today so I went with this recipe from Pastry Affair. They are not very sweet which I like but I found them a bit dry. So next time I make lemon blueberry scones, I think I will stick to this recipe from Baking Bites that I've used several times but maybe decrease the lemon juice in the dough a little bit because it can get quite wet. Now that I've been writing about them I feel like having another one! 

And that has been our weekend so far! I can't believe we are in the last week of June already. What have you got planned for the summer? What are you looking forward to doing? 

Wednesday, June 5, 2013

Pâte à Choux + Profiteroles


I borrowed Julia Child's cookbook "Mastering the Art of French Cooking" from the library a few weeks ago and of course I turned to the sweet section first. A lot of Julia Childs' recipes are quite complicated and require a lot of steps and a lot of measurement converting on my part. After watching Rachel Khoo make chouquettes, I knew making the pastry dough for profiteroles would not be so hard. In fact, it is a real breeze. Pâte à choux is a pastry dough that is used to make chouquettes, eclairs, profiteroles, and croquembouches to name a few. So learning how to make this dough could come in handy!


Pâte à Choux (adapted from Julia Child)
Makes about 24 small puffs

1 cup water
86g unsalted butter
pinch of salt
1 tsp sugar
3/4 cup flour
4 eggs

Preheat the oven to 218C and line a baking sheet with parchment paper.

Bring water to a boil in a saucepan/pot together with the butter, salt, and sugar and boil slowly until the butter has melted. Meanwhile, measure out the flour.

Remove the boiling mixture from the heat and immediately pour in all of the flour at once. Beat vigorously with a wooden spoon for several seconds to blend thoroughly. Then beat over a moderately high heat for 1 to 2 minutes until the mixture leaves the sides of the pan and the spoon, forms a mass, and begins to coat the bottom of the pan. 

Remove saucepan from the heat and stir the dough for a minute or two to help it cool down slightly. Make a well in the center of the dough before beating the first egg into the pastry until it is absorbed. Continue with the rest of the eggs beating them in one by one. the third and fourth eggs will be abosrbed more slowly. Beat until everything is blended and the dough is smooth. 

Scrape the dough into a piping bag (with or without a large round tip) and pipe puffs that are 1 and a half inches in diameter or whatever size you would like them. Brush with an eggwash if desired. (You will need another egg for this, I skipped this step.)

Bake at 218C for about 20 minutes. The puffs are done when they have doubled in size, are golden brown, and firm and crusty to the touch. Remove them from the oven, turn off the heat, and pierce the side of each puff with a sharp knife to release the steam. Then place the puffs back in the oven and leave the door ajar for 10 minutes. Cool the puffs on a rack. Use the same day, or freeze them to use at a later time. (If you go the freezing route, put the frozen puffs in the oven for a few minutes to recrisp them.)


To turn my little puffs into profiteroles, I just cut a little slit in them and filled it with a spoon of vanilla ice cream and topped them with a sprinkling of icing sugar and some raspberries. 

Bon appétit!

Thursday, April 18, 2013

Mochi Ice Cream

I get really strange cravings. Like last week, I really wanted to have mochi ice cream, like the ones I could buy from the asian supermarket at home in Vancouver. I did some googling and found some recipes so of course I had to give it a shot! Oh, and just so you know, you are in for a long and photo heavy post!

The recipe I have tried comes from Japanese Ice Cream and Cooking with Dog, they have basically the exact same ingredients and steps. The video that Cooking with Dog has posted is first, super informative and shows you how to do everything step by step so definitely check that out if you want to make some mochi ice cream. Plus the Japanese lady is super cute and I've watched a few more of her youtube videos featuring different Japanese dishes. The one thing I did really differently is that I cooked the mochi in a small sauce pot rather than in the microwave because we don't have one. (Refer to this video as to how to make mochi on the stove.) The mochi dough cooks even quicker on the stove than in the microwave, it just requires more arm strength and stirring! For those in Copenhagen, I bought this glutinous/sticky rice flour at Den Kinesiske Købmand by Nørreport.


Mochi Ice Cream (from Cooking with Dog and Japanese Ice Cream)
Makes 6 to 8 mochi ice cream balls depending on the size

50 g (3.5 tbsp) glutinous/sticky rice flour
100 g (7 tbsp) white sugar
100 ml water (a tad less if you are using 1 tbsp of fruit puree)
1 tbsp fruit jam or puree (optional)
cornstarch as needed
approximately 10 tbsp of ice cream


Start by scooping out 6 or 8 balls of ice cream, more or less ice cream depending on what size you want your ice cream mochis to be. Place ice cream scoops on a cutting board or plate covered with parchment or wax paper. Freeze for approximately 2 hours.


To prepare for the mochi, cover a baking tray or pan generously with cornstarch.


Mix the glutinous/sticky rice flour and the sugar in a saucepan. Slowly add the water and stir until there are no traces of flour left. Optional step, strain the fruit jam or puree through a fine sieve to remove any seeds or lumps. Stir the tablespoon of fruit puree into the wet mixture until combined.


Turn the stove onto medium heat and continuously stir the mixture with a rubber spatula. After two or three minutes, you will notice that the mixture begins to thicken and it will thicken up even more really fast. Keep stirring! Turn the heat down as low as you can and stir rapidly for another minute or two. The mochi dough is ready when it has formed a thick gummy like texture, is shiny and smooth, but still pliable and soft. 


Scrape the mochi dough onto the prepared tray. Sift some more cornstarch over the dough and begin to  push the warm mochi to spread it out over the tray. You want to gently stretch out the mochi with your fingertips, and spread it enough to be able to cover your desired number of ice cream balls. Let the mochi cool for a few minutes before placing it in the refrigerator for 30 minutes.


Take the chilled mochi out of the fridge and divide the dough into enough pieces to cover your desired number of ice cream scoops. Either use the rim of a cup to cut circles out of the mochi, or just cut it with a knife to make square-ish pieces. Gently pick up each mochi wrapper, lightly dust off excess cornstarch and place it on a plate covered with saran wrap. Put a layer of saran wrap over each mochi wrapper and repeat until you have used up all your mochi. Place the mochi wrappers in the freezer for at least 30 minutes and up to an hour.

Take the mochi sheets and the frozen ice cream scoops out of the freezer. Work quickly so that the ice cream doesn't melt too much! Place the rounded scoop side of ice cream into the middle of the mochi piece and fold the edges up onto the bottom side of the ice cream. Re-wrap in saran wrap and freeze. Repeat with all your remaining ice cream scoops and mochi layers. 

Keep your mochi ice cream in the freezer until you are ready to eat them. Enjoy!

We have been enjoying our mochi ice cream the last two nights for dessert. They're great because you really only need one little ice cream mochi ball to satisfy your sweets/dessert craving! Even the boyfriend who doesn't normally like food with sticky wrapper type things on them (think sticky wrappers on dim sum) is really liking these!


Have you had mochi ice cream before? If not, you need to try making these! It is so strange how I miss foods like this that I haven't had in years. But luckily, I can now make my own! If you try or have tried making your own mochi ice cream, I'd love to hear about your experience with it!

Saturday, January 19, 2013

Strangas Dessert Boutique


After going to Paris with the boyfriend back in 2011 and eating as many macarons as I could, I started hunting for macarons in Copenhagen. And one of the places that made macarons here was Strangas Dessert Boutique. So I've known about Strangas for awhile now, like almost two years, and I finally went yesterday! (It is probably better for my wallet that I have not gone sooner!) 


Although I love macarons and still need to try the ones that they have, I went for a chocolate mango seabuckthorn mousse cake and a vanilla panna cotta with pineapple. The boyfriend and I shared both desserts last night and loved them both. The mousse cake was light, the chocolate did not mask the mango and seabuckthorn mousse, and visually, I loved the texture of the outside of the cake. Nikolaos Strangas was at the counter when I was at the conditori and he convinced me to try his panna cotta. I can make panna cotta so I wasn't initially drawn to it. But when he told me his method of making panna cotta, I needed to try it. His panna cotta was not like the ones I have made. The vanilla bean panna cotta was very smooth, soft, and had a caramel taste. It had the texture of a pudding rather than jello. Writing about all of this makes me want to go back and try something else...

If you love desserts, go visit Strangas!

Strangas Dessert Boutique
Åboulevard 7
1635 Copenhagen V
(really close to Forum and the lakes)